DVA-2800 Setup Guide
This guide will step you through how to configure your DVA-2800. These settings reflect the standard configuration we ship our router/modems with, make sure to follow these instructions carefully, to avoid problems.
Keep in mind that this guide will only be applicable if your internet connection is fully functioning. If you are experiencing connection issues, please call GOINTERNET support on 1300 467 283.
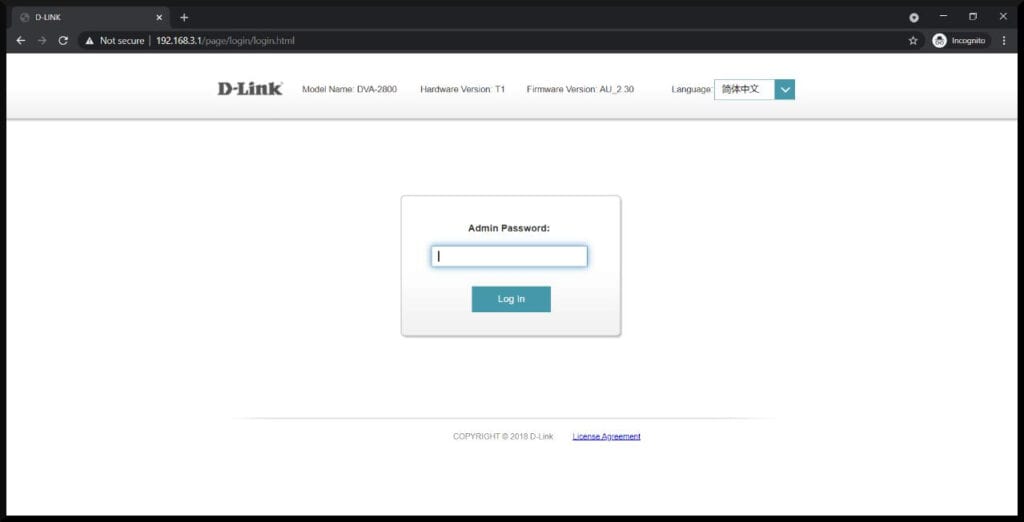
1. Login to your router’s portal.
a. Go to your web browser of choice and in the search bar, type in the IP Address: 192.168.1.1
b. After typing the IP Address in your search bar; you’ll be on the D-Link Configuration Portal.
NOTE: If that IP address doesn’t work, please call the GOINTERNET Support Team on 1300 467 283.
c. Enter your router/modem’s Admin Password to login.
Your login details are kept on record by GOINTERNET, and are provided via email upon signing up. If you do not have the password, please call our support team at 1300 467 283, and they can provide you the password.
If you have reset your modem to factory settings, the admin password will be “admin”.

2. Configure your WAN Access Type
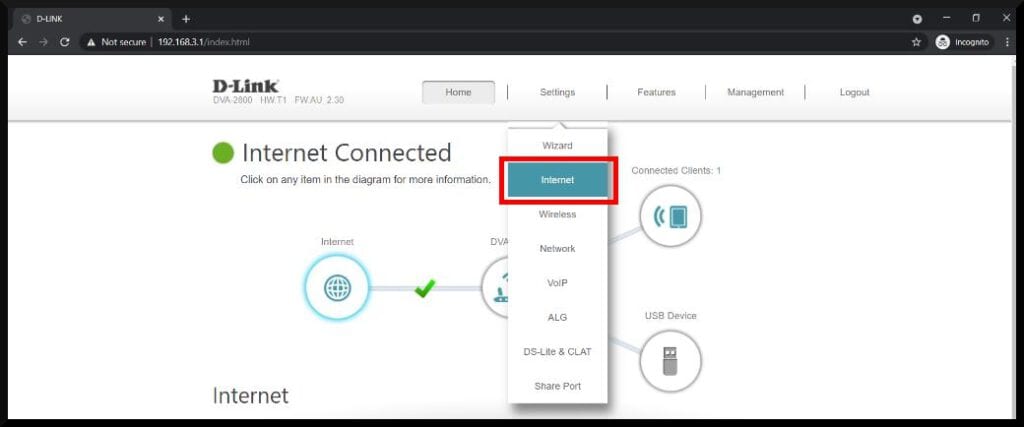
a. Hover over ‘Settings’ and click on ‘Internet’ in the drop-down.


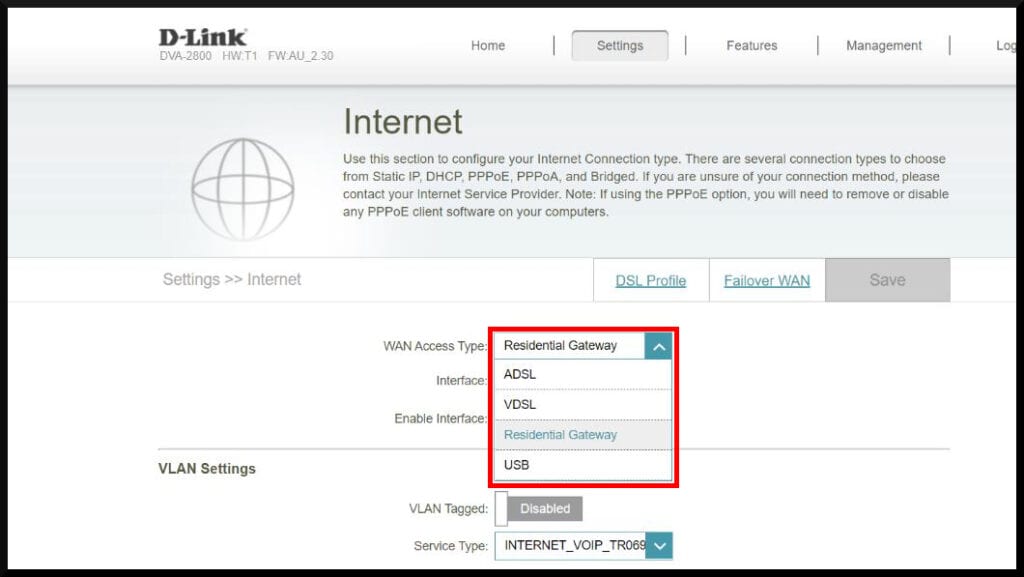
b. In the ‘Internet’ Settings, the first drop-down setting “WAN Access Type” will need to be changed according to your connection type.
i. If your connection type is HFC (Hybrid Fibre Coaxial), FTTC (Fibre to the Curb) or FTTP (Fibre to the Premises), make this setting: “Residential Gateway”
ii. If your connection type is FTTB (Fibre to the Basement) or FTTN (Fibre to the Node), make this setting: “VDSL”
Note: If you are not sure what your connection type is, you can contact our support team and they’ll be able to tell you.


3. Configure VLAN Settings
NOTE: If your connection type is FTTP (Fibre to the Premises), skip this step.
a. Enable “VLAN Tagged”.
b. Type “100” in the “VLAN ID” setting.


4. Scroll down to ‘IPv4 Settings’
a. In the ‘My Internet Connection is:’ drop-down, select “PPPoE”.
b. Enter your Username and Password. These are given to you upon sign-up. If you don’t have them, call our Support Team.


5. Leave all other settings as default.
6. Click ‘Save’
7. Hover over ‘Management’ in the top menu and click on ‘System Admin’ in the drop-down.


8. On the Admin Page, change the ‘Admin Password’ to the IPv4 password we set in Step 4.


9. Scroll down to ‘Administration’.


10. Click ‘Save’
Configure for VoIP
NOTE: If your connection type is FTTP (Fibre to the Premises), skip this step.
1. Hover over ‘Settings’ in the top menu and click on ‘VoIP’ in the drop-down.


2. On the VoIP page, click on the ‘VoIP Provider’ drop-down and select “ATU”.


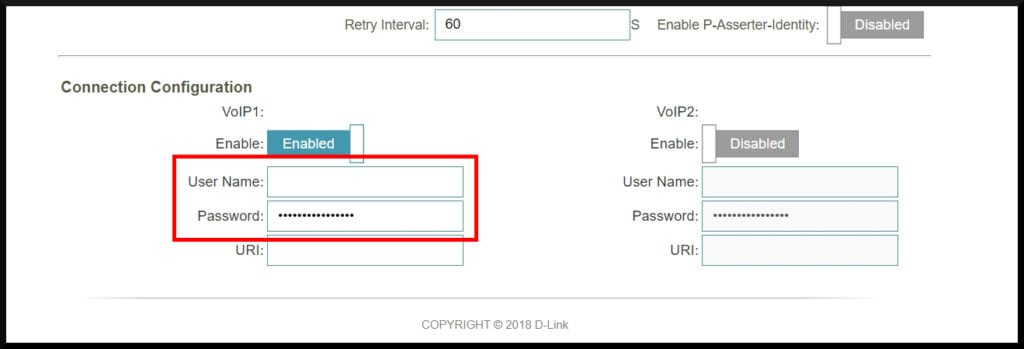
3. Scroll down to ‘Connection Configuration’. Enable VoIP1, make sure VoIP2 is disabled.
a. Enter your VoIP Username and Password. Both of these are available in your account at https://my.gointernet.net.au/


4. Click ‘Save’
Your D-Link DVA-2800 is now setup and ready to use.
If you have further questions are need help with your setup, contact our support team.

